Modern Quilting for Beginners: Tools & First Quilt Steps
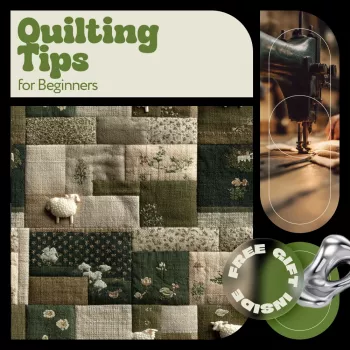
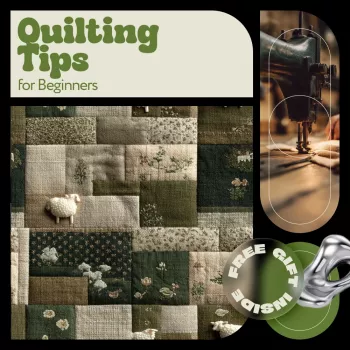
A Step-by-Step Start to Modern Quilting: Tools, Techniques, and a First Quilt You’ll Be Proud Of
Modern quilting doesn’t require fancy motifs or complicated blocks. A strong first quilt comes from a repeatable workflow: choose a simple plan, cut accurately, sew consistent seams, press with intention, then finish with stable quilting and clean binding. The goal is a finish that lies flat, looks crisp, and feels satisfying—without getting derailed by crooked blocks, puckers, or wavy borders.
Before the First Cut: Pick a Beginner-Friendly Quilt Plan
Start with a design that forgives small imperfections and finishes fast. Patchwork squares, strip quilts, and large modern blocks keep seams straight and decisions simple. A baby quilt, lap quilt, or wall hanging is ideal because it lets you practice every stage—top, sandwich, quilting, and binding—without burning out halfway through.
Keep fabric choices tight (3–6 solids/prints) so your layout looks cohesive. Before you shop, confirm the finished size, seam allowance (typically 1/4 inch), and yardage. Also decide early whether you’ll quilt with straight lines (easiest) or free-motion (more practice needed).
| Option | Why it’s beginner-friendly | Skills practiced | Typical pitfalls to watch |
|---|---|---|---|
| Patchwork squares | Repeats one block shape | Accurate cutting, consistent seams | Blocks mismatching due to uneven seam allowance |
| Strip quilt | Fast assembly with long seams | Pressing, nesting seams | Wavy strips from stretching on the bias |
| Large modern blocks | Fewer seams, bold look | Precision cutting, layout balance | Noticeable errors if cutting is off |
| Precut-friendly (charm squares, jelly rolls) | Less cutting time | Chain piecing, matching corners | Precuts can vary slightly in size—trim if needed |
Essential Tools That Make Quilting Easier (and More Accurate)
A few well-chosen tools prevent the most common early issues: drifting seam allowances, inaccurate cuts, and ripples caused by stretching.
- Cutting setup: rotary cutter with a sharp blade, self-healing mat, and a clear acrylic ruler for repeatable cuts.
- Sewing essentials: quality thread, a fresh needle (often 80/12 or 90/14), plus a 1/4-inch foot or seam guide if your machine supports it.
- Pressing tools: a reliable iron and sturdy pressing surface. Pressing (lift and set) keeps shapes truer than sliding the iron back and forth.
- Safety and comfort: good lighting, a comfortable chair, and finger guards for rotary cutting help you stay accurate longer.
- Nice upgrades: seam roller, clips, and a simple design wall (a felt sheet or batting) for layout.
Fabric Prep and Cutting: The Accuracy Stage
Modern quilts often feature clean negative space and bold shapes, which means cutting accuracy matters. Decide whether to prewash, then stay consistent for the quilt top, backing, and binding. Prewashing can prevent surprise shrinkage and help remove excess dye—especially for high-contrast quilts.
- Press fabric before cutting; wrinkles translate into incorrect measurements.
- Square up first: straighten one edge and create a true right angle before cutting strips or squares.
- Use steady pressure with a sharp blade. If you’re forcing the cut, it’s time to replace the blade.
- Label stacks (A, B, C) so similar-looking pieces don’t get mixed during assembly.
Piecing Step by Step: Seam Allowance, Pressing, and Consistent Blocks
The fastest path to “my blocks don’t match” is a seam allowance that slowly drifts. Before you commit to a full stack of pieces, do a quick seam test: sew three pieces, press, and measure the unit against what the pattern expects.
- Chain piece to speed up: feed pairs through one after another without clipping threads between them.
- Press consistently: to one side (common) or open (reduces bulk). Follow the pattern when nesting seams is important.
- Nest seams for crisp intersections by pressing adjoining seams in opposite directions so they “lock.”
- Trim and square up as you go. Slightly off blocks get harder to fix after rows are sewn together.
Assemble the Quilt Top Without Wavy Borders
Take five minutes to lay out your blocks before sewing rows. Step back, check contrast, and look for accidental repeats (two identical prints touching can weaken a modern layout).
Quilt Sandwich 101: Backing, Batting, and Basting
- Choose batting based on warmth and drape, and follow the maker’s quilting-distance guidelines (see Warm Company batting guidance).
- Baste securely (pins, spray, or thread). More basting usually equals fewer puckers.
- Smooth from the center outward without stretching; stretching creates ripples that quilting can’t hide.
For a quick overview of common batting types, Quilters Paradise’s Batting 101 is a helpful reference.
Beginner Quilting Techniques: Straight Lines That Look Modern
For foundational technique refreshers, National Quilters Circle offers beginner-friendly quilting basics.
Binding Step by Step: A Clean Finish for First Quilts
Troubleshooting the Most Common Beginner Problems
A Guided, Repeatable Path from First Cut to Final Stitch
- Step-by-step quilting ebook for beginners (modern layouts, tools, and beginner sequencing)
- How to Talk to Kids About Emotions – Practical Parenting Guide (digital guide collection option)
- Cat Grooming by Breed: The Ultimate Guide (another popular digital read in the shop)
FAQ
What is the easiest quilt pattern for a first-time quilter?
Patchwork squares, simple strip quilts, and large modern blocks are among the easiest because they use straight seams and repeatable steps. Smaller projects like a baby quilt or wall hanging help you finish quickly and learn the full process.
Do beginners need a walking foot to quilt?
A walking foot isn’t strictly required, but it’s strongly helpful for straight-line quilting because it feeds layers evenly and reduces shifting and puckers. If you quilt without one, slow down, baste more, and practice on a small sandwich first.
Why are my quilt blocks not coming out the right size?
The most common causes are an inconsistent 1/4-inch seam allowance, pressing that distorts pieces, or cutting that’s slightly off-square. Test-sew and measure a sample unit, then trim blocks to a uniform size before assembling the quilt top.










Leave a comment